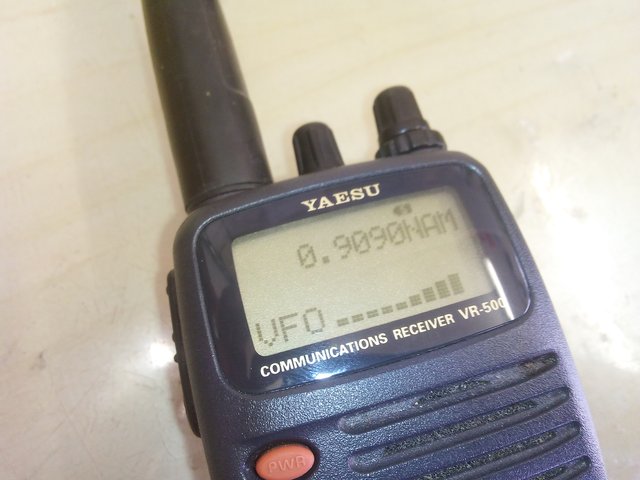
Nasty and horrid missing lines on your Yaesu VR500?
Don't panic, there is a fix. I wonder how many of these units have been junked due to this problem?
What you need:
Small screwdrivers.
Hammer.
SMT hot air station.
How to fix it:
- Remove batteries. Remove two case fixing screws inside the battery compartment
- Remove two case fixing screws at the top rear of the case
- Remove the Belt Clip and fixing screw
- Separate the case halves
- Remove the tuning knob by pulling
- Remove the SQL knob
- Remove the volume knob
- Remove the antenna if attached
- Remove the rubber washer on the antenna socket
- Remove the rubber washer on the volume control shaft
- There are three fixing nuts holding the controls and the antenna socket in place. Find a flat bladed screwdriver that fits nicely in the gaps on the fixing nuts. A bigger one for the antenna socket. Grab a small hammer.
- Sit down, clamp the radio between your legs. Put the screwdriver into the gap on the fixing nut, pointing along the direction of unscrewing, anticlockwise. Strike the screwdriver with the hammer several times, until the nut starts to move. Then tap gently to loosen it off. Then remove each nut by rotating it with the screwdriver. The antenna nut is done up quite tight, so try to get several good strikes in before you mangle the nut.
- They're all free? Yes! Remove the two black fixing screws holding the button and display PCB into the bottom of the front case.
- Remove the chassis from the front case
- Remove the side button cover and socket cover and seal
- Look at the display. It has a metal cover. At the top, with a small screwdriver, free the metal lugs by bending them away from the PCB and out. Free the metal lugs at the bottom by levering up the metal cover right next to them, they will bend and free with some force
- Carefully lift the glass screen up at the back, away from the plastic frame behind it. It's glued along the bottom, gently pull it until the glue separates. Don't yank it, you'll wreck it. If its glued really well, apply some IPA to soften it.
- When it's free, flip it forward
- Ease the plastic frame off the illumination LED at the side. Twist it up to free it at the bottom of the LED and then free it from the top.
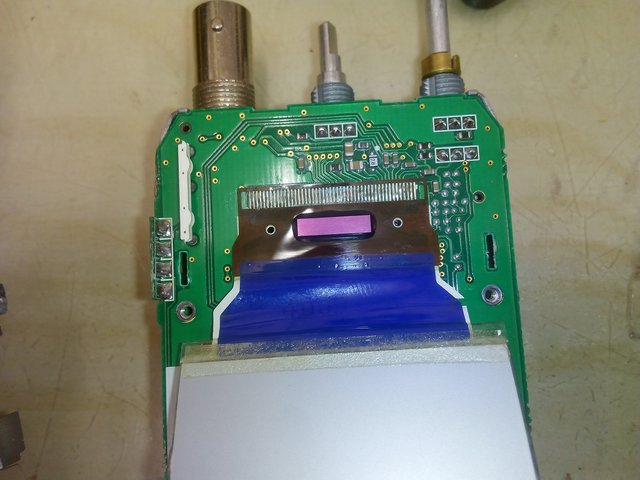
- The failure occurs between the contact of the brown plastic with the IC on it and the white plastic leading to the LCD. The top edge of the blue plastic covers the area of interest.
- Put a fine nozzle on your SMT heat gun. Set to 180 degrees and allow the temperature to settle. Move the nozzle quickly from side to side heating up the area of contact, right on the edge of the blue plastic. Don't hang in one place, it will melt the blue plastic! Quickly place the gun on the table and run your fingernail along the area of contact several times, with a reasonable pressure. Careful note: 180 degrees may be too much, there was a crackle from the blue plastic when it came up to temperature. Maybe try 140 to be safe, first.
- Fit some batteries into the rear of the case. Note how the power gets from the battery to the button contact PCB via two sprung contacts
- Fit the chassis into the rear of the case. The unit should switch on, flip the LCD forward. Check all display segments are present. If not, do the heating process above again. I had to do it twice.
- Remove the chassis from the case rear. Remove the batteries.
- Fit the clear plastic frame back into position, clipping the LCD back in. Locate the peg at the top in the PCB first. Then the bottom of the LED, then the peg at the right hand side
- Place the LCD screen back into the plastic frame, keeping the bottom flush with the edge of the frame.
- Straighten up the tabs on the metal frame. Fit it back into place. I bent the tabs at the top in a bit, didn't bother with the bottom ones.
- Put the plastic button covers, socket covers and seal back into place. The seal runs along the back of the unit.
- Place the chassis ino the plastic front cover, keeping the seal out of the way. Then push the seal into grooves along the sides and top of the front cover.
- Fit the two small black screws at the bottom of the button panel PCB.
- Fit the retaining nuts for the antenna socket and two controls. Place the small screwdriver into the cutouts on the nuts rotate them then push them tight
- Fit the rubber washers back into place for the antenna and the VOL control.
- Replace the SQL collar knob and the tuning knob. Replace the VOL knob
- Clip the rear of the case in at the bottom, then push the case halves back together. Fit the fine thread metal case screws at the top. Replace the belt clip and fixing screw. Fit the plastic self tapping thread case screws at the bottom, inside the battery compartment. Done!